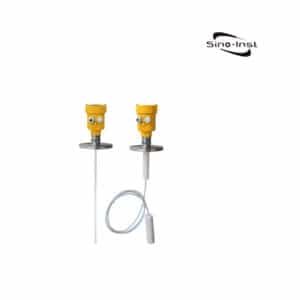
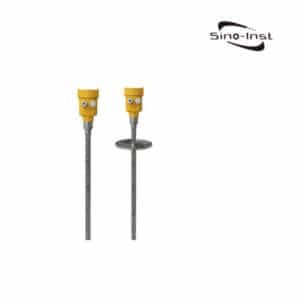
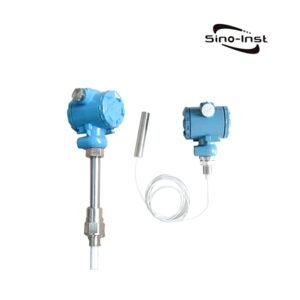
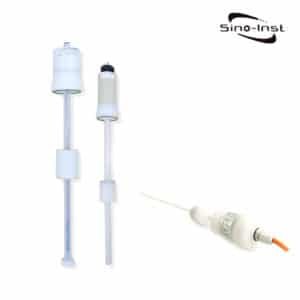
Online Density Meter (DP Type) — Hydrostatic Density Measurement for Slurry & Viscous Fluids

The online DP density meter measures liquid density from a hydrostatic pressure difference between two fixed points in the process. Range is 0.5 – 2.5 g/cc (500 – 2500 kg/m³), accuracy ±0.5% of reading, output 4–20 mA + HART. It handles slurries, corrosive acids, and viscous fluids where Coriolis tubes stall and tuning-fork probes foul, because the sensing diaphragms sit flush and see only pressure — not flow, not viscosity, not bubble content. Where DP head measurement is impractical — concentrated acid services for example — consider non-contact radar for H2SO4 tank level with a corrosion-resistant antenna instead.

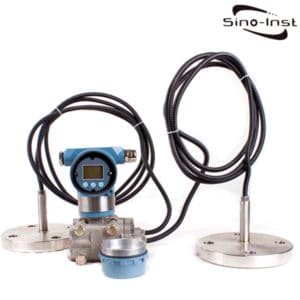
Sino-Inst builds the DP density meter around a high-accuracy differential pressure transmitter and two flush-diaphragm seals connected by oil-filled capillaries. Pick the variant below by your fluid, tank height, and wetted material, then confirm on the spec table.

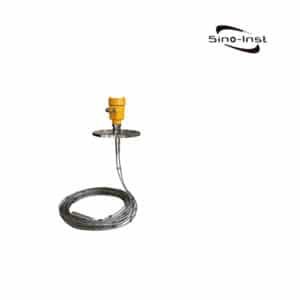
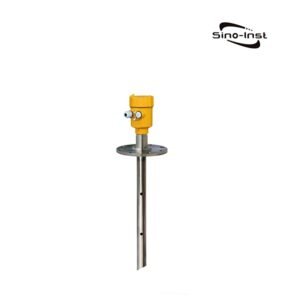
Online DP density meter with differential pressure transmitter and remote diaphragm seals

Features of the Online DP Density Meter

  • Hydrostatic measurement principle — density comes from ΔP between two known heights. No moving parts in the wetted path, no flow dependency, no viscosity limit.
  • ±0.5% of reading accuracy — with a temperature-compensated DP cell and matched capillaries, density resolves to ±1 kg/m³ across the span.
  • Slurry and viscous-fluid capable — flush diaphragm seals stay clean in tailings, cement slurry, black liquor, sugar syrup, and heavy residuum where Coriolis and tuning fork fail.
  • No density calculation in the host — the transmitter outputs density directly in g/cc, kg/m³, °Bé, °Brix, or concentration %, so the PLC just reads a process variable.
  • Wide wetted-material menu — 316L stainless standard; Hastelloy C-276, Monel 400, tantalum-lined, PTFE-capped options for acids, caustics, and chlorides.
  • Mount on tank, bypass loop, or pipeline — tank-side flanges, insertion rods, inline bypass chambers, and open-sump stilling-well installations are all supported.
  • 4–20 mA + HART + RS-485 Modbus RTU — drops straight into a DCS or PLC. Local LCD shows density, temperature, and percent concentration simultaneously.

Technical Parameters

Measuring range0.5 – 2.5 g/cc (500 – 2500 kg/m³); concentration 0 – 100%
Accuracy±0.5% of reading (±1 kg/m³ typical)
Repeatability±0.1% of reading
Operating temperature-40 °C to +120 °C (standard); up to 200 °C with extended capillary
Process pressureup to 2.5 MPa (higher on request)
Viscosity limitno upper limit — measurement is pressure-based, not flow-based
Wetted material316L stainless (std); Hastelloy C-276, Monel 400, tantalum, PTFE-lined (opt)
Diaphragm sealFlush-mount; 2″, 3″, 4″ or DN50/80/100 flange; sanitary tri-clamp available
Fill fluidSilicone oil (std); inert halocarbon or high-temp fluorolube (opt)
Capillary length1 m to 10 m, vacuum-sealed, armor-clad
Output4–20 mA with HART 7; RS-485 Modbus RTU option
Power supply24 VDC, loop-powered
Enclosure ratingIP66/67 aluminum alloy; Ex d IIC T6 available
Derived readingsDensity, %solids, °Bé, °Brix, concentration %, specific gravity

DP Density Meter Working Principle

A column of liquid exerts a hydrostatic pressure proportional to its density times the height of the column: P = ρ × g × H. If you measure pressure at two points separated by a known vertical distance H in the same fluid, the difference between them depends only on the fluid density:

ρ = ΔP / (g × H)

The online DP density meter takes the two pressure readings through flush-mounted diaphragm seals connected to a differential pressure transmitter by oil-filled capillaries. Because the separation H is fixed by the mechanical installation, ΔP is a direct read-out of density. The transmitter applies a temperature correction using its own built-in Pt100, then outputs density, percent concentration, or °Bé through 4–20 mA / HART.

Because the diaphragms sense only pressure, the measurement is independent of flow rate, viscosity, and bubble content. The meter keeps reading through two-phase flow, solids concentrations up to ~60%, and high-viscosity liquors where Coriolis U-tubes stall. Solids that would coat a tuning-fork probe slide off a flush diaphragm. For a deeper comparison of principles, see our tuning fork density meter and Coriolis density meter product pages.

Models & Configurations

The DP head and transmitter stay the same across models. What changes is the wetted material, diaphragm style, and mounting fit. Pick the variant by your fluid and installation, then confirm on the spec table above.

ModelWetted materialMountingBest for
Tank-side flanged316L stainless2 × DN50/DN80 PN16 flange on tank wallOpen tanks, atmospheric storage, general slurry service
Remote capillary seal316L or Hastelloy CCapillary 1 – 10 m between seals and DP cellLong reach installations, high-temp or cryogenic service
Bypass loop316L + isolation valvesBypass chamber off main pipeline, DN50 inlinePipeline mounting where tank access is limited
Anti-corrosionHastelloy C-276, tantalum, or PTFE-cappedFlange or clamp, per alloyStrong acid, caustic, chlorinated fluids
Sanitary tri-clamp316L electropolished, 3A cert1.5″ or 2″ tri-clampFood, dairy, brewery, pharma

Other options: high-temp extended-diaphragm (up to 200 °C with fluorolube fill), submersible IP68 for open sumps and basins, and purged-style for fluids that would plate out on a diaphragm. Specify the medium and we’ll recommend the diaphragm alloy and fill fluid. For installation practices that affect DP accuracy, see our DP transmitter installation guide.

Applications

DP density meters are the default choice anywhere density or concentration is a controlled process variable and the fluid is too dirty, too viscous, or too two-phase for Coriolis or tuning-fork technology. The flush-diaphragm interface plus remote capillaries is what makes them field-robust.

  • Mining & mineral processing — thickener underflow, tailings pipeline, cyclone feed density, dredger discharge
  • Pulp & paper — black liquor density in chemical recovery, bleach liquor concentration
  • Chemical — sulfuric acid, caustic soda, aqueous ammonia, ferric chloride concentration control
  • Oil & gas — crude oil storage and transfer, heavy residuum, drilling mud density
  • Food & beverage — sugar syrup °Brix, dairy concentrate, wort gravity, tomato paste
  • Power — flue gas desulfurization limestone slurry density
  • Water & wastewater — thickened sludge, lime milk dosing, MLSS monitoring

Split-Type Density Meter for Liquids

Separated sensor and transmitter configuration — best for high-temperature or hazardous-area installations where the electronics stay remote.

Industrial Slurry Density Meter

Heavy-duty DP-based density solution for dredging, tailings, and cement — wear-plated diaphragms handle abrasive slurries.

Coriolis Density / Concentration Meter

Inline Coriolis density with ±0.0005 g/cc accuracy — the reference technology for clean, single-phase custody-transfer service.

Need sizing help? Our engineers match a DP density meter to your fluid, tank height, and wetted material, and ship a drawing plus quote the same day. Send the line data below and we’ll come back with a variant recommendation.

Request a Quote

Request a Quote

Please enable JavaScript in your browser to submit the form

Ammonia Flow Meter: Gas, Liquid & Aqueous NH3 Selection Guide

Updated April 20, 2026 by Sino-Inst Engineering Team

Choosing an ammonia flow meter starts with one question: is the NH3 liquid, gas, or switching between both? Each phase demands a different meter technology. Anhydrous liquid ammonia pressurized to 10 bar behaves nothing like gaseous ammonia in a refrigeration vapor line, and treating them as “the same fluid” is the number one sizing mistake we see on ammonia projects.

Contents

What is an ammonia flow meter?

An ammonia flow meter is an industrial flow measurement device designed to handle the physical and chemical properties of NH3: corrosive to copper and brass, toxic above 25 ppm exposure, and phase-changing between vapor and liquid over a narrow temperature and pressure window. The meter must be built in NH3-compatible materials (316L stainless steel, PTFE, Viton), rated for the working pressure (typically 10–20 bar for liquid, 2–4 bar for vapor), and sized for the expected phase.

Ammonia is used in fertilizer production, industrial refrigeration, and increasingly in chemical energy storage. Every one of these applications needs a flow meter that survives NH3 and reports mass or volume to better than ±1% for process control and better than ±0.5% for custody transfer.

Gas vs liquid ammonia — why phase decides the meter

Liquid ammonia has a density of about 682 kg/m³ at 0 °C; gaseous ammonia at atmospheric pressure is 0.77 kg/m³ — roughly 900 times less dense. Volumetric meters read volume, not mass, and the same meter on two different phases will give two radically different mass readings at the same 4–20 mA output.

StateTypical conditionsKey measurement concernPreferred meters
Anhydrous liquid NH3−33 °C to +30 °C, 5–20 barFlashing, vapor bubbles at low ΔPCoriolis, turbine, positive displacement
Gaseous NH3Ambient, 0.5–4 barLow density, needs P&T compensationThermal mass, Coriolis, vortex with compensation
Aqueous ammonia (NH4OH)Ambient, 1–5 bar, 20–30% concentrationConductivity 5–50 mS/cm, corrosiveMagnetic (PFA-lined), Coriolis
Refrigeration two-phase−40 °C to −10 °C, 1–3 barSlug flow, wet vaporCoriolis, thermal on superheated-only lines

Coriolis wins on pure ammonia because it measures mass directly. Phase does not matter — 1 kg of liquid NH3 reads the same as 1 kg of gaseous NH3 as long as the flow is single-phase across the tubes. The cost is higher upfront, but you buy out the density compensation problem entirely.

For aqueous ammonia (ammonium hydroxide), the conductivity rises to 5–50 mS/cm and a PFA-lined magnetic flow meter becomes the right answer. Anhydrous ammonia has essentially zero conductivity, which is why magmeters do not work on pure NH3.

Meter types that work on ammonia service

Coriolis mass flow meter

Direct mass reading, phase-independent, ±0.1% accuracy on liquid NH3. The default choice for any high-accuracy ammonia service — custody transfer, fertilizer blending, refrigerant charging. 316L wetted parts as standard. Cost is 3–5× a comparable volumetric meter. For ammonia density verification downstream, see our liquid ammonia density measurement guide.

Thermal mass flow meter

Best on clean, dry gaseous NH3 at steady pressure. The meter measures heat transfer between two RTDs, which is density-sensitive, so sudden pressure changes require recalibration. Accuracy is ±1% of reading for well-controlled flow. Not suitable for two-phase or wet refrigerant vapor. Related: see how Karman vortex flow detection compares to other mass air flow methods.

Turbine flow meter

Works on single-phase liquid anhydrous ammonia with a strainer ahead. Accuracy is ±0.5% of reading across 10:1 turndown. Stainless steel body and PTFE bearings are required; brass and bronze are not ammonia-compatible. Cheaper than Coriolis; a good choice for OEM skids and intermediate-accuracy applications.

Vortex flow meter

Handles high-pressure gaseous ammonia in superheated lines. Needs external pressure and temperature compensation to convert volume to mass. Minimum Reynolds number of 10,000 means low flows drop out. Rugged, no moving parts, good for 250+ °C service where Coriolis is not rated.

Differential-pressure (V-cone, orifice, Verabar)

Large-DN gaseous ammonia lines in fertilizer plants often use DP elements. V-cone handles dirty gas better than orifice. Accuracy ±1–2% of full scale; turndown limited to 4:1 without a smart DP transmitter. Needs separate pressure and temperature inputs to compute mass.

Magnetic (electromagnetic)

Does not work on anhydrous NH3 (too low conductivity). Works on aqueous ammonia (ammonium hydroxide), aqueous urea, and urea-ammonia blends used in SCR DEF systems. PFA lining is mandatory for corrosion resistance.

How to choose an ammonia flow meter

Work through these decisions in order. Skipping even one leads to a meter that does not fit the service.

  1. Phase: liquid, vapor, two-phase, or aqueous? Each demands a different meter category.
  2. Accuracy needed: custody transfer (±0.2%) drives you to Coriolis. Process control (±1%) opens the door to turbine, thermal, or vortex.
  3. Pressure and temperature: ammonia refrigeration runs at −40 °C; urea-ammonia plants run at 160 °C. Check the meter temperature spec carefully.
  4. Line size and flow range: match meter to flow velocity, not pipe DN. See 6-inch DN150 flow meter selection for guidance on larger lines.
  5. Materials: 316L stainless steel is standard. No copper, no brass, no aluminum in wetted parts. PTFE and Viton for seals. Soft seals for ammonia refrigeration must be certified for NH3 service (EPDM is acceptable; Buna-N is not).
  6. Hazardous area rating: ammonia is classified Group IIA in IEC, so most industrial certifications cover it. Confirm ATEX or IECEx zone rating on the nameplate.
  7. Output: 4–20 mA for standalone instruments, Modbus RS-485 for skid integration, HART for DCS diagnostics. For flow totalization, the meter must support pulse output or Modbus totalizer.

Related service: if you also need to measure ammonia gas concentration or leak detection, see the gas analyzers in our industrial gas flow measurement range — same housing platform, different sensor.

Where ammonia flow meters are used

  • Fertilizer production: urea, ammonium nitrate, and compound fertilizer plants meter anhydrous ammonia and process gas.
  • Industrial refrigeration: NH3 as refrigerant in cold storage, food processing, ice rinks, and district cooling.
  • SCR NOx reduction: aqueous ammonia or urea-ammonia injection into flue gas for power plant emission control.
  • Agricultural direct application: anhydrous NH3 injection into soil as a nitrogen source; high-flow, seasonal demand.
  • Chemical energy storage: emerging use of green ammonia as hydrogen carrier; high-purity, custody-transfer metering.
  • Semiconductor manufacturing: precursor gas flow control at low flow rates; thermal mass meters dominate.

Triangle Coriolis Mass Flowmeter

Direct mass measurement for liquid anhydrous ammonia and custody-transfer duty. ±0.1% accuracy, 316L wetted parts, −50 °C to +150 °C. Phase-independent — handles occasional vapor flash without losing signal.

V-Cone Flow Meter

Low-maintenance DP element for gaseous NH3 in large-DN fertilizer and SCR lines. ±1% accuracy, excellent turn-down with smart DP transmitter, no moving parts, tolerates dirty gas.

Magnetic Stainless Steel Flow Meter

PFA-lined electromagnetic meter for aqueous ammonia (NH4OH) and urea-ammonia SCR injection. ±0.2% of rate, 100:1 turndown, no moving parts, no straight-run penalty past DN50.

FAQ

What flow meter is used for anhydrous ammonia?

A Coriolis mass flow meter is the standard choice for anhydrous liquid ammonia. It reads mass directly, is unaffected by phase flashing, and uses 316L stainless steel — fully compatible with NH3. For lower accuracy or OEM cost points, a stainless steel turbine with PTFE bearings is a valid alternative.

Why can’t a magnetic flow meter measure anhydrous NH3?

Magnetic flow meters need a conductivity above about 5 µS/cm to generate a signal. Anhydrous ammonia has essentially zero conductivity. Aqueous ammonia is highly conductive and a magmeter works perfectly on NH4OH, but not on pure NH3.

How do you meter ammonia gas flow?

For dry, single-phase NH3 vapor, use a thermal mass flow meter or a Coriolis. For large lines in fertilizer plants, a V-cone or Verabar DP element with pressure and temperature compensation computes mass from volume. Vortex meters work above Reynolds 10,000 but require external compensation.

What materials are compatible with ammonia?

316L stainless steel, PTFE, Viton, EPDM, and some grades of polypropylene are compatible with ammonia. Copper, brass, bronze, zinc, and aluminum all react with NH3 and must not be used in wetted parts. Seals should be EPDM or PTFE, never Buna-N.

What is the accuracy of an ammonia Coriolis flow meter?

Typical Coriolis accuracy on liquid ammonia is ±0.1% of reading over 10:1 turndown. For custody-transfer installations, calibration to ±0.05% is available by the manufacturer. Pressure and temperature do not affect accuracy because Coriolis reads mass directly.

Can one flow meter handle both liquid and gas ammonia?

Only Coriolis can. Because Coriolis measures mass, a calibrated meter reads correctly whether the tube is full of liquid or gas, as long as flow is single-phase through the measuring section. Volumetric meters (turbine, vortex, thermal) lose accuracy immediately on phase change.

Looking for a quote on an NH3 flow meter? Send your phase, pressure, temperature, flow range, and pipe size. Our engineering team will match a meter, confirm materials compatibility, and issue a specification sheet within 24 hours.

Request a Quote

Please enable JavaScript in your browser to submit the form

Pressure Transmitter 4-20mA Faults: Troubleshooting Checklist

Updated April 20, 2026 by Sino-Inst Engineering Team

A 4–20 mA pressure transmitter with “no output” looks like a dead sensor, but it almost never is. In our field records, 80% of no-output calls trace to five things: wrong wiring polarity, low supply voltage, an open loop, a clogged impulse line, or a damaged diaphragm. Work down this list in order and you will find the fault before opening the transmitter housing. If the issue traces back to the original commissioning, our differential pressure transmitter installation walkthrough.

If your transmitter outputs the wrong direction with flow rate, suspect a Pitot or DP installation where dynamic head and static pressure are confused — see our static vs dynamic vs total pressure guide before chasing electronics.

Contents

First 60 seconds: what to check before touching anything

Before any multimeter goes on the loop, rule out a control-system cause. 30% of reported transmitter failures are actually DCS tag problems or PLC analog card faults.

  • Check the DCS tag: is the scale correct? A transmitter reading 50% shown as 0% is a tag fault, not a transmitter fault.
  • Check the analog input card: pull a second channel from the same card. If it also reads 0, the card is dead.
  • Check the 24 V power supply: measure DC at the marshalling panel, not at the PSU. Long cable runs drop 2–4 V at 20 mA loop current.
  • Look at the transmitter display: a local LCD showing pressure but the DCS showing zero means the loop is broken somewhere between the transmitter and the DCS input card.

Pull recent maintenance records. If another technician just swapped wiring, changed a fuse, or opened an isolation valve, that is your most likely cause.

The basic loop test — multimeter in series

Loop current tells you what the transmitter is actually putting out. A multimeter set to mA, wired in series, is the single most diagnostic tool you have.

  1. Set multimeter to DC mA, 200 mA range.
  2. Disconnect the positive loop wire from the transmitter + terminal.
  3. Put the multimeter red lead on the transmitter + terminal, black lead on the disconnected wire. Loop must stay unbroken.
  4. Read the current.
ReadingWhat it meansNext step
4.00 mA ±0.05Transmitter healthy, pressure at zeroCheck if that is plausible. If not, look at impulse line and diaphragm.
3.8–5 mA, unstableLoose terminal, moisture, or bad groundTighten terminals. Check for water in conduit. Verify shield grounded at one end only.
< 3.6 mAFailed low alarm — transmitter detects internal faultCheck local display for error code. Diaphragm, electronics, or calibration fault likely.
> 21 mAFailed high alarm — out-of-range or sensor shortCheck process pressure vs URL. Diaphragm may be over-ranged.
0 mANo loop — open circuit or no supplyGo to Fault 1 and Fault 2.

A working 2-wire transmitter must draw at least 4 mA to run its own electronics. If you see 0 mA, the transmitter itself is not even booted — the loop is open or the supply is too low.

Fault 1: Wiring reversed or open

Reversed polarity is the #1 cause of a just-installed transmitter reading zero. The transmitter has reverse-polarity protection on most models, so it does not blow — it just sits there drawing nothing.

  • Confirm + goes to transmitter +, — goes to transmitter −. Labels on the terminal block are authoritative, not the cable color.
  • Check conductor continuity end-to-end. Marshalling cabinet to field junction box to transmitter.
  • For 2-wire transmitters, there are only two terminals. For 4-wire units (powered separately), signal and power are on different pairs — do not confuse them.
  • For installation best practice, see our pressure transmitter installation guide.

Fault 2: Low supply voltage at the transmitter

Most 4–20 mA transmitters need a minimum of 10–16 V DC at the terminals to operate. The nominal 24 V supply at the control room can drop below that by the time it reaches a field transmitter at the end of a 400 m cable loop with a 250 Ω sense resistor.

Calculate minimum supply voltage:

V_supply_min = V_transmitter_min + (0.020 A × (R_sense + R_cable + R_barrier))

For a 250 Ω sense resistor, 25 Ω cable loop, IS barrier at 300 Ω, and a transmitter needing 12 V:

V_supply_min = 12 + 0.020 × (250 + 25 + 300) = 12 + 11.5 = 23.5 V

A 22 V supply on that loop will leave the transmitter cold. Swap to a 24 V or 28 V supply, or move the sense resistor closer to the transmitter. For HART communication, keep at least 250 Ω in the loop — see our HART pressure transmitter guide for the full loop math.

Fault 3: Blocked impulse line or closed isolation valve

A perfectly healthy transmitter will read 4 mA if the process pressure never reaches the diaphragm. Blocked impulse lines are the #1 process-side cause of flat output.

  • Is the manifold isolation valve open? Walk the line from the process tap to the transmitter and touch every valve.
  • Is the impulse line plugged? Crystallization, scale, and wax plug lines over time. A hot-water flush through the tap usually clears it.
  • Is there trapped gas in a wet leg or trapped liquid in a dry leg? Both sides of a DP transmitter must be the phase the installer intended. Our DP transmitter installation guide covers impulse-line filling procedures.
  • On a diaphragm seal transmitter, is the capillary oil leaked out? Touch the face of the remote seal: a sunken diaphragm means fill fluid is gone and the transmitter needs factory service.

Fault 4: Damaged or saturated diaphragm

An over-ranged diaphragm reads a constant upper limit (20 mA or higher) regardless of real pressure. A cracked or stretched diaphragm reads constant low or drifts with temperature.

  • Bench test: remove the transmitter, apply a known pressure with a hand pump, and watch output. A linear 4–20 mA response across 0–100% means the sensor is good.
  • Stuck at 20+ mA: diaphragm over-ranged, or electronics stuck in failed-high state. Most transmitters recover after a pressure release and a power cycle.
  • Stuck at 4 mA, no response to pressure: diaphragm mechanically damaged or the pressure sensing element is shorted internally. Replace the transmitter or send for repair.
  • Reading drifts with ambient temperature: fill fluid has migrated or the sensing diaphragm has permanent deformation. Replace.

Fault 5: Drifted zero, failed electronics

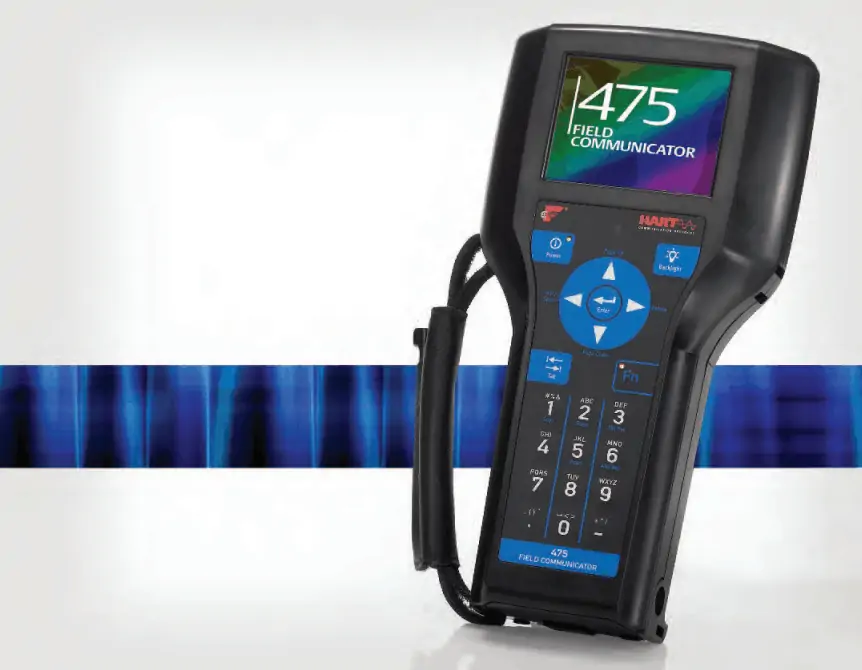
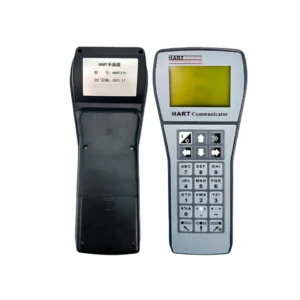
A transmitter that reads a steady 6–8 mA with no process pressure applied is usually alive but with drifted zero. This is fixable in the field with a HART communicator or via the local zero push-button.

  1. Isolate the transmitter from process pressure.
  2. Vent both sides of a DP transmitter to atmosphere (open the equalizer valve on the manifold).
  3. Trigger a zero-trim — via HART, the local button, or the DCS asset management software.
  4. Check that output is now 4.00 mA ± 0.02.
  5. If zero-trim does not hold, the electronics are drifting. Replace.

Do not confuse zero drift with span drift. Zero drift is a constant offset at zero pressure. Span drift shifts the 20 mA endpoint. Both are trimmable through the transmitter menu, but persistent drift after trimming means the sensor is degrading and the unit is near end-of-life.

Replacement options

Process Industrial Pressure Transmitter

General-purpose 4–20 mA with HART. ±0.075% accuracy, 10-year stability. Direct drop-in replacement for legacy Rosemount 3051 and Yokogawa EJA loops.

SMT3151 TGP Gauge Pressure Transmitter

Compact 2-wire gauge pressure unit for utilities and OEM use. ±0.1% accuracy, 0.4 kPa to 42 MPa range, IP67 housing. Fast zero-trim via magnetic button.

Diaphragm Seal Pressure Transmitter

Flush-flanged remote seal for viscous, slurry, or high-temperature service. Eliminates impulse-line blockage. 316L wetted parts, PTFE option, capillary lengths to 10 m.

FAQ

Why does my 4-20mA pressure transmitter read 0 mA?

Zero milliamps means the loop is open or unpowered. A healthy 2-wire transmitter always draws at least 4 mA. Check supply voltage at the transmitter terminals (should be 12 V DC or higher), then check for reversed polarity and for a fuse or broken wire anywhere in the loop.

What does a 20 mA output mean when there is no pressure?

The transmitter has entered a failed-high alarm state. This happens when the sensor detects an internal fault — over-ranged diaphragm, failed ADC, or memory corruption. Cycle power to clear transient faults. If 20 mA persists at zero pressure, replace the transmitter.

How do I test a 4-20mA pressure transmitter with a multimeter?

Set the multimeter to DC mA (200 mA range), break the loop at the + terminal, and insert the meter in series. The multimeter becomes part of the current path. You should read 4 mA at zero pressure and 20 mA at full scale. Never put a multimeter in parallel with a 4–20 mA loop — it will short the signal to ground.

Can low voltage damage a 4-20mA transmitter?

Low supply voltage does not damage the transmitter, but it prevents normal operation. Below the minimum operating voltage (typically 10–12 V at the terminals), the transmitter either does not boot or outputs an unstable current. Fix the supply; the transmitter will resume normal service.

How often should a pressure transmitter be recalibrated?

Annual recalibration is standard for custody transfer and safety-critical loops. For general process control, 3–5 years is typical if the transmitter has not been exposed to over-range events, temperature cycling beyond spec, or corrosive service. Trend the zero drift year over year — if it is accelerating, shorten the interval.

Still stuck on a 4–20 mA loop that reads wrong? Send us the transmitter tag, loop wiring diagram, and the current DCS reading. Our engineers will walk through the fault tree with you and recommend a replacement unit if yours is end-of-life.

Request a Quote

Please enable JavaScript in your browser to submit the form

Tuning Fork Density Meter

The tuning fork density meter is an inline vibrating-fork sensor that measures liquid density from 0 to 2500 kg/m³ with ±1 kg/m³ accuracy. The fork tines sit directly in the process line — their resonant frequency shifts with the density of the fluid between them, giving a continuous 4–20 mA or Modbus signal with no moving parts. It handles slurries, corrosive acids, and two-phase fluids that break Coriolis meters, and it calibrates once and holds over years.

Sino-Inst ships the tuning fork density meter in eight mounting styles and several wetted-material options (316L, Hastelloy C, PTFE-lined, titanium). Pick the variant below by your fluid and pressure, then confirm with the specs table.

Features of Tuning Fork Density Meter

  • Direct inline density — no sample loop, no rotameter, no density calculation from pressure/temperature. The fork sits in the live process line.
  • ±1 kg/m³ accuracy, ±0.1 kg/m³ repeatability — matches most Coriolis meters on density alone, at a fraction of the cost.
  • Handles bubbles and slurries — the vibrating fork keeps reading through two-phase flow and solids loading up to ~50%, where Coriolis tubes stall.
  • No moving parts — no bearings, no seals, no wear. Typical service life is 8+ years on continuous duty.
  • Wide wetted-material menu — 316L, 2205 / 2507 duplex, Hastelloy C, titanium, PTFE or PFA lining for acids and chlorinated solvents.
  • Eight process connections — DN50 PN16, G1.5″ thread, 3″ tri-clamp, IDF, RJT sanitary, top-mounted rod up to 3 m, submersible IP68 cable, stirred-tank offset bracket.
  • 4–20 mA + HART + Modbus RTU — drops straight into a PLC or DCS. The transmitter also reports °API, °Brix, concentration %, and specific gravity directly.

Technical Parameters

Measuring range0 – 2.5 g/cc (0 – 2500 kg/m³); 0 – 100%
Accuracy±0.001 g/cc (±1 kg/m³); ±0.5% of reading
Repeatability±0.001 g/cc (±0.1 kg/m³); ±0.1%
Operating temperature-50 °C to +150 °C
Working pressureup to 4 MPa
Viscosity range0 – 2000 cP
Temperature coefficient< 0.1 kg/m³/°C after compensation
Wetted materials316L / 2205 / 2507 stainless; Hastelloy C; Titanium; PTFE/PFA lined
Fork coatingStandard PTFE or PFA
Power supply24 VDC, ≥50 mA
Output4–20 mA, 0–1000 Hz, RS-485 Modbus RTU, HART
Output accuracy±0.1% of reading or ±0.05% FS
Process connectionDIN 50 PN16, G1.5″ thread, 3″ tri-clamp, IDF, RJT sanitary
Enclosure ratingIP65 aluminum alloy housing
Derived readingsDensity, °API, °Brix, concentration %, mass %, volume %, specific gravity

Tuning Fork Density Meter Working Principle

A piezo driver excites the two fork tines at their natural resonant frequency in vacuum — typically around 1300 Hz. When the fork is immersed in a liquid, the fluid adds effective mass to the tines, and the resonant frequency drops. The frequency shift is proportional to the liquid density.

The transmitter measures this frequency, applies a temperature correction (a built-in Pt100 reads process temperature), and converts to density in kg/m³, °API, °Brix, or concentration %. Because the measurement is based on a physical resonance of the fork — not a flow-dependent effect — density is independent of flow rate, viscosity (up to 2000 cP), and orientation. That’s why a tuning fork works in a storage tank as well as a high-velocity process line.

The fork is also insensitive to bubbles and solids. Small bubbles and particles pass between the tines without damping the resonance. This is the single biggest difference from a Coriolis density meter, which shuts down on two-phase flow.

Models & Configurations

The tuning-fork head is the same mechanical principle across all models. What changes is the wetted material, mounting style, and process fit. Pick the variant by your fluid and pressure, then confirm on the spec table above.

ModelWetted materialTemp / pressureBest for
Alcohol Concentration variant316L stainless-40–120 °C / 4 MPaBreweries, distilleries, beverage batching
Submersible variant316L + IP68 cable-20–80 °C / 0.6 MPaTank bottoms, open reservoirs, settling ponds
Anti-corrosion variantHastelloy C-276 or PTFE-lined-20–150 °C / 4 MPaAcid, caustic, chlorinated solvents
Slurry / heavy-duty variantWear-plated 316L-20–100 °C / 2.5 MPaDredging, mining tailings, cement

Other available configurations: threaded (G1-1/2) for standard process lines, flange-standard (DN50 PN16-20592) for slurry service including lime and mud, sanitary 3″ tri-clamp for pharma and food, top-mounted rod up to 3 m insertion for large tanks, and stirred-tank special with offset bracket. Custom wetted materials include Hastelloy C, titanium, 2205 and 2507 duplex stainless, and aluminum — specify the medium and we’ll recommend the right alloy.

Applications

Tuning fork density meters show up wherever density is the controlled process variable — concentration in blending, solids loading in slurry, end-point in reactors, interface detection in pipelines that batch multiple products. The fork handles bubbly fluids and slurries that would break a Coriolis meter.

  • Petrochemical — batch interface detection in product pipelines (gasoline / diesel / jet fuel), density-based reactor end-point
  • Mining & dredging — slurry solids concentration in thickener underflow, tailings transport, dredger discharge lines
  • Brewing & beverage — wort gravity, fermentation progress, CIP verification
  • Pharmaceuticals — solvent blending, API concentration monitoring, granulation liquor
  • Food — sugar syrup °Brix, dairy cream fat content, concentrated juice blending
  • Pulp & paper — black liquor density in chemical recovery
  • Chemical — sulfuric acid concentration, sodium hydroxide concentration, aqueous ammonia
  • Power — flue gas desulfurization limestone slurry density

Handheld Petroleum Density Meter

Portable micro-vibrator digital density meter for on-site crude, gasoline, and refined-fuel density checks.

Coriolis Density / Concentration Meter

Inline Coriolis density and concentration meter for high-accuracy custody transfer and brewing applications.

Slurry Density Meter

Heavy-duty slurry density solution for dredging, mining tailings, and cement — the same family as our dredger case study.

Need sizing help or a drawing review? Our engineers can match a tuning fork density meter to your fluid, pressure, and mounting, and ship a quote the same day. Send us the line data below and we’ll get back with a variant recommendation and price.

Request a Quote

Please enable JavaScript in your browser to submit the form

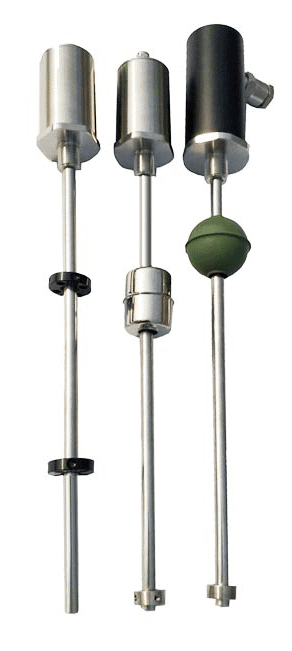
SI-100 Rigid Probe Magnetostrictive Level Transmitter | 0.2-6 m, ±0.1 mm

SI-100 Rigid Probe Magnetostrictive Level Transmitter

Stainless probe, 0.2 to 6 m measuring range, ±0.1 mm accuracy, 4-20 mA / HART / Modbus, ATEX option. Built for atmospheric and pressurized tanks where you need a rigid stem instead of a flexible cable.

  • Range: 0.2-6 m rigid. Up to 23 m with flexible cable variant.
  • Accuracy: ±0.1 mm or 0.05 % of FS, whichever is greater.
  • Output: 4-20 mA + HART, RS-485 Modbus RTU, or 0-10 V.
  • Process: -40 to +125 °C standard, +200 °C with extension. PN16/PN40 flange or 1″ NPT.
  • Certifications: ATEX/IECEx Ex ia IIC T6 Ga (Zone 0 capable). IP67.

Why Engineers Spec the SI-100

Four reasons it gets picked over float, ultrasonic, or guided-wave radar in our daily quote requests.

±0.1 mm

Repeatable Accuracy

Better than float by ~50× and better than 4-20 mA radar by ~10× for tanks under 6 m.

No Drift

Time-of-Flight Reading

The torsional pulse on the waveguide does not drift with temperature, dielectric, or coating.

2 Outputs

4-20 mA HART + Modbus

Drops into a PLC analog input or a Modbus poll loop without buying a new transmitter.

ATEX Ex ia

Zone 0 Capable

Same body as the standard model; just add the safety barrier on the cabinet side.

Full Specification Sheet

What you will see on the line item of the quote. Download the PDF datasheet from the request form below.

ItemSI-100 StandardSI-100 Ex (ATEX/IECEx)
Probe typeRigid stainless rod, 316LRigid stainless rod, 316L
Measuring range0.2 m – 6 m0.2 m – 6 m
Resolution0.01 mm0.01 mm
Linearity±0.05 % FS or ±0.1 mm (greater)±0.05 % FS or ±0.1 mm (greater)
Repeatability±0.005 % FS±0.005 % FS
Output4-20 mA / HART / Modbus RTU / 0-10 V4-20 mA + HART (Ex ia) / RS-485 (Ex ia)
Power supply24 VDC ±10 %24 VDC via Ex ia barrier
Process temperature-40 to +125 °C (+200 °C with extension)-40 to +85 °C (T6) / -40 to +120 °C (T5)
Process pressure0 – 4 MPa (40 bar)0 – 4 MPa (40 bar)
Process connection1″ NPT / G1″ / DN50 PN16 / DN50 PN40 flangeSame as standard
Float (included)SUS304 ring float, 50 mm OD, ≥ 0.6 g/cm³SUS304 ring float with Ex cable gland
HousingAluminum die-cast, IP67Aluminum die-cast, IP67
Cable entryM20 × 1.5M20 × 1.5 with Ex cable gland
Hazardous areaSafe area onlyEx ia IIC T6…T4 Ga (Zone 0)
ApprovalsCE, RoHSCE, RoHS, ATEX, IECEx

How Magnetostriction Actually Measures Level

  1. The transmitter head fires a low-current interrogation pulse down a tensioned waveguide wire inside the rigid stem.
  2. A donut float wrapped around the stem carries a permanent magnet. Where the pulse meets the magnetic field, the wire twists slightly — that twist is a torsional pulse.
  3. The torsional pulse travels back up the waveguide at ~2,830 m/s. The transmitter clocks the round-trip time.
  4. Distance = ½ × travel time × wave speed. A 1 GHz timer gives 0.01 mm resolution.

Why it matters in the field: no capacitance plate to coat, no ultrasonic beam to scatter on foam, no microwave dielectric to fight. The pulse is mechanical and the trigger is magnetic, so dirty liquids, vapors, and dielectric changes do not affect the reading.

Where the SI-100 Fits (and Where It Doesn’t)

The rigid-stem version owns four common tank shapes. If your tank looks like one of these and the depth is under 6 metres, the SI-100 is a one-line BOM addition.

Ceiling / Suspended Tanks

Top-mount through a flange. Probe length picked to leave 50 mm dead zone at the bottom. Common in chemical dosing rooms.

Buried Fuel Tanks

Diesel, petrol, or AdBlue. 4-20 mA + HART output feeds station controllers. Choose Ex ia version for petrol.

Small Process Containers

Day tanks, mixing vessels, lube reservoirs. Short probe (300-800 mm) keeps the float stable in narrow geometry.

Agitated / Foaming Tanks

Use the external stilling-well variant. The float sits inside a side chamber so the agitator does not whip it around.

When NOT to spec the SI-100: tanks deeper than 6 m (use flexible-cable variant or guided-wave radar), liquids with floating crust or solid foam thicker than 20 mm, and any liquid with metallic suspended solids that could stick to the float.

Three Ways to Mount It

Tell us which one fits your tank when you request the quote and we will ship the right adapter pre-fitted.

1. Top Mount (Thread or Flange)

Default option. 1″ NPT, G1″, or DN50 PN16/PN40. Probe drops straight down through the tank top.

2. Positioning Ring

For tanks where you cannot drill a flange. A clamping ring holds the rigid stem at the top opening.

3. External Stilling Well

Side-mounted chamber connected by upper and lower process taps. Used for agitated, foamy, or coating liquids.

Sizing the Probe Length

The probe is cut to order. Get this wrong and you either lose dead-band at the top or pay for steel you do not need. Three numbers go on the quote:

  1. H1 — Top Dead Zone: 50 mm minimum from the flange face down to the highest reading point. Add the height of the top fitting (a DN50 flange eats 30-60 mm).
  2. H2 — Live Measuring Length: the distance you actually want to read. Make this the working range you care about, not the full tank height.
  3. H3 — Bottom Dead Zone: 50 mm fixed, set by where the float magnet sits on the end stop.

Total probe length = H1 + H2 + H3, rounded up to the nearest 50 mm. For a tank 1.2 m tall with full coverage, order a 1300 mm probe (50 + 1200 + 50).

Two real-world examples from quotes we shipped last quarter:

TankWorking Level NeededProbe OrderedOutput Wired To
2.5 m vertical day tank, diesel0 – 2.4 m2500 mm rigid, 4-20 mA HARTAllen-Bradley AI card
0.8 m mixing vessel, IPA0.1 – 0.7 m800 mm rigid, Modbus RTU, Ex iaSchneider M340 RS-485
4.2 m underground petrol tank0 – 4.0 m4200 mm rigid, 4-20 mA HART, Ex iaStation controller

Pricing and Lead Time

FOB Shanghai, EXW China for orders ≥ 5 units. Stock items ship in 5 working days; configured items 10-15 days.

ConfigurationProbe LengthUnit Price (USD, Qty 1-4)Lead Time
SI-100 Standard, 4-20 mA≤ 1.0 m$6805 days (stock)
SI-100 Standard, 4-20 mA + HART≤ 2.0 m$88010 days
SI-100 Standard, Modbus RTU≤ 3.0 m$1,15010 days
SI-100 Ex ia, 4-20 mA + HART≤ 6.0 m$1,65015 days
SI-100 with Stilling-Well ChamberConfigured$1,950 +15 days

Bulk pricing (10+ units) drops 12-18 % depending on configuration. Quote turnaround is the same business day for any spec listed above.

If the SI-100 Doesn’t Fit Your Tank

Three alternatives we ship for the cases the rigid SI-100 cannot cover:

Frequently Asked Questions

What’s the Longest Rigid Probe You Will Build?

6 metres. Beyond that the rigid stem is hard to ship and to install, so we switch you to the flexible-cable variant which goes to 23 m.

Will It Work With Diesel That Has Water at the Bottom?

Yes, with two floats. The dual-float SI-100 gives you total liquid level (top float on diesel) and water-interface level (lower float on the diesel/water boundary). Specify on the quote.

Can I Retrofit It Where a Guided-Wave Radar Used to Be?

If the existing flange is DN50 or 1″ NPT, yes — drop-in. The 4-20 mA + HART output keeps your DCS configuration unchanged.

Does the Float Density Matter?

Standard SUS304 ring float works for liquids ≥ 0.6 g/cm³. For lighter liquids (like LPG condensate at 0.55 g/cm³) we ship a low-density titanium or PTFE float. Tell us the SG when you request the quote.

Which Output Should I Order for a Siemens S7-1500 PLC?

4-20 mA + HART for the simplest path (S7-1500 has analog input cards). If you are already on Profibus or Profinet, take the Modbus RTU version and run it through a gateway.

How Is the SI-100 Calibrated Before Shipping?

Each unit is bench-tested with the actual ordered float against a precision linear stage. A two-point calibration certificate (4 mA at empty, 20 mA at full) is included in the box. Field calibration is rarely needed.

Get a Confirmed Quote and PDF Datasheet

Tell us tank height, liquid, mounting style, and your PLC, and we will come back with a unit price and the full PDF datasheet within one business day.

Request a Quote

Please enable JavaScript in your browser to submit the form

Verabar Flow Meter: Averaging Pitot Tube Specs & Comparison

Updated on April 18, 2026 — The Verabar flow meter is an averaging pitot tube that measures flow by sensing differential pressure across multiple ports in a pipe cross-section. It handles pipe sizes from DN50 to DN6000, covers gas, steam, and liquid service, and delivers ±1% accuracy with far less permanent pressure loss than an orifice plate. This page covers the Verabar working principle, full specifications, and a head-to-head comparison with the Annubar.

Contents

What Is a Verabar Averaging Pitot Tube Flow Meter?

A Verabar flow meter is a multi-port averaging pitot tube that measures volumetric or mass flow rate by calculating the average velocity pressure across a pipe diameter. Unlike a single-point pitot tube that samples velocity at one location, the Verabar uses four or more sensing ports distributed along the probe length to capture the actual velocity profile, including boundary layer effects near the pipe wall.

The technology was originally developed by Yokogawa (formerly Dietrich Standard) under the Verabar trade name. It belongs to the family of differential pressure flow elements but differs from orifice plates, Venturi tubes, and flow nozzles in one critical way: the Verabar is an insertion element. It slides into the pipe through a single penetration point, so installation does not require cutting the pipe or breaking flanged joints on large-diameter lines.

This insertion design makes the Verabar the preferred DP element for pipes above DN200 (8 inches). An orifice plate for a DN600 line is heavy, expensive, and causes 40–70% permanent pressure loss. A Verabar in the same line causes roughly 3–5% permanent pressure loss and costs a fraction of the orifice assembly.

How Does a Verabar Flow Meter Work?

The Verabar works by measuring the difference between total pressure (impact) and static pressure at multiple points across the pipe diameter, then averaging those readings into a single DP signal.

Multi-Port Averaging Principle

The probe body has two internal chambers. The upstream face contains multiple impact ports (typically 4–8 depending on pipe size) that sense total pressure — the sum of static pressure and velocity pressure. The downstream face has low-pressure ports that sense static pressure plus a slight negative pressure from wake effects.

Each impact port is positioned at a specific distance from the pipe center according to the equal-area method (Chebyshev spacing). This ensures that each port represents an annular ring of equal cross-sectional area, so the arithmetic average of all port readings equals the true mean velocity across the full pipe section.

DP Signal and Flow Calculation

The averaged high pressure and averaged low pressure are routed to a differential pressure transmitter. The transmitter outputs a DP signal that relates to velocity by the Bernoulli equation:

V = K × √(2 × ΔP / ρ)

Where V is velocity (m/s), K is the flow coefficient (determined by probe geometry), ΔP is the measured differential pressure (Pa), and ρ is the fluid density (kg/m³). Volumetric flow rate Q then equals V × A, where A is the pipe cross-sectional area.

The Verabar’s bullet-nose profile generates a stronger DP signal than round or diamond-shaped averaging pitot tubes. Typical DP output runs 2–5 times higher than a standard round pitot probe at the same velocity, which improves the signal-to-noise ratio and extends the usable turndown range.

For applications where flow rate needs to be expressed in gallons per minute rather than standard volumetric units, see flow meters with GPM units.

Verabar Flow Meter Specifications

The table below lists the standard specification range for Verabar averaging pitot tube flow meters. Actual limits depend on the specific model variant (insertion vs flanged) and process conditions.

ParameterSpecification
Pipe Size RangeDN50–DN6000 (2″–240″)
Accuracy±1.0% of reading (typical); ±0.5% with in-situ calibration
Repeatability±0.1% of reading
Turndown Ratio10:1 (standard); up to 15:1 with high-sensitivity DP transmitter
Max Operating Pressure40 MPa (ANSI 2500 class)
Temperature Range−40°C to +450°C (standard); up to +650°C with ceramic-coated probe
Probe Material316L SS (standard), Hastelloy C-276, Monel, Duplex 2205
Process ConnectionInsertion (compression fitting), flanged (ANSI 150–2500)
Output Signal4–20 mA with HART (via DP transmitter); optional Modbus, FOUNDATION Fieldbus
Permanent Pressure Loss3–5% of measured DP (vs 40–70% for orifice plate)
Straight Pipe Requirement8D upstream / 4D downstream (minimum); 15D/7D recommended

The straight pipe requirements above are general guidelines. Actual upstream/downstream distances depend on the type of disturbance (elbow, tee, valve). For detailed spacing rules by fitting type, refer to the upstream and downstream straight pipe reference.

What Is the Difference Between Verabar and Annubar?

The Verabar (Yokogawa) and Annubar (Emerson/Rosemount) are both averaging pitot tube flow meters, but they differ in probe profile shape, signal strength, and clog resistance. The table below compares the two on the parameters that matter most for selection.

FeatureVerabarAnnubar (485)
Probe ProfileBullet-nose (rounded leading edge)T-shaped (flat leading edge)
DP Signal StrengthHigher — rounded profile creates stronger wake separationModerate — T-shape produces lower DP at same velocity
Accuracy±1.0% of reading±0.75% of reading (Annubar 485 with calibration)
Repeatability±0.1%±0.1%
Clog ResistanceGood — bullet nose sheds debris; self-cleaning in moderate-particle flowsModerate — T-shape can collect buildup on leading face
Permanent Pressure Loss3–5% of DP4–8% of DP
Max Temperature+450°C (std); +650°C (special)+450°C (std); +600°C (special)
Max PressureANSI 2500 (40 MPa)ANSI 2500 (40 MPa)
Pipe Size RangeDN50–DN6000DN25–DN2400
Typical Cost (DN300)$800–$1,500$1,200–$2,500
OEM / ManufacturerYokogawa (Dietrich Standard)Emerson (Rosemount)

When to Choose Verabar Over Annubar

Choose the Verabar when you need coverage for very large pipes (above DN2400), when the process fluid carries light particulates (the bullet nose is less prone to fouling), or when the project budget is tight. The Verabar also generates a stronger DP signal at low velocities, which helps in turndown-sensitive applications like natural gas distribution lines.

Choose the Annubar when the application requires traceable ±0.75% accuracy without in-situ calibration, when you already have a Rosemount DP transmitter infrastructure, or when the pipe is below DN50 (the Annubar goes down to DN25).

Both options produce far less permanent pressure loss than orifice plates or flow nozzles. For a broader comparison of DP flow elements including Venturi tubes, see the flow element selection guide.

What Pipe Sizes and Fluids Suit a Verabar?

The Verabar averaging pitot tube covers DN50 to DN6000 (2″ to 240″), making it one of the widest pipe-size ranges among all flow meter types. Its sweet spot is DN200 and above, where competing technologies become impractical or prohibitively expensive.

Gas Applications

Natural gas, compressed air, nitrogen, flue gas, and biogas. The Verabar’s strong DP signal works well with gases because gas DP readings are inherently small. Typical gas velocities range from 3 m/s to 60 m/s. For custody transfer, pair with a multivariable DP transmitter that compensates for pressure and temperature in real time.

Steam Applications

Saturated steam and superheated steam up to +450°C (or +650°C with special probes). The insertion mounting style is a major advantage for steam service — hot-tapping the probe into a live steam line takes less than an hour, with no shutdown required. Steam velocities from 5 m/s to 80 m/s are within the standard operating range.

Liquid Applications

Water, condensate, light hydrocarbons, and chemical solutions. For dirty liquids with suspended solids, select a probe with purge ports that allow periodic cleaning without removal. The Verabar is not recommended for high-viscosity fluids (above 30 cP) because low Reynolds numbers distort the velocity profile and degrade accuracy.

Sizing Consideration for Large Pipes

For pipes above DN1000 (40″), the probe length exceeds 1 meter. At this length, structural vibration from vortex shedding can become a concern. Verify that the probe’s natural frequency is at least 3× the expected vortex shedding frequency at maximum velocity. Most manufacturers provide vibration analysis as part of the sizing calculation for DN1000+ applications.

Sino-Inst manufactures averaging pitot tube flow meters equivalent to the Verabar design, along with companion DP transmitters and alternative flow elements for pipes below DN50.

Averaging Pitot Tube (Verabar-Style)

Verabar averaging pitot tube for DN50-DN6000 gas, steam and liquid lines. Just 3-5% permanent pressure loss vs 40-70% for orifice plates — huge energy savings on large pipes.

Smart DP Transmitter SI-3051

SMT3151DP smart DP transmitter with German MEMS monocrystalline silicon sensor. HART and RS485 Modbus RTU protocols, 0.075% accuracy — the go-to for flow, level and density loops.

Orifice Plate Flow Meter

SI-LG orifice plate flow meter — the standard DP primary element for steam, gas and clean liquids. Supports concentric, segmental and eccentric plates, pairs with any smart DP transmitter.

FAQ

What is a Verabar flow meter?

A Verabar flow meter is an averaging pitot tube that measures flow by sensing differential pressure at multiple points across a pipe diameter. It was developed by Yokogawa (originally Dietrich Standard) and uses a bullet-nose probe profile to generate a strong, stable DP signal. It covers pipe sizes from DN50 to DN6000 and works with gas, steam, and liquid.

How accurate is a Verabar flow meter?

Standard accuracy is ±1.0% of reading with factory calibration. With in-situ calibration against a reference meter, accuracy can reach ±0.5% of reading. Repeatability is ±0.1%. These figures hold across the 10:1 turndown range; accuracy degrades below 10% of full-scale flow.

Can a Verabar be installed without shutting down the line?

Yes. The insertion-type Verabar supports hot-tap installation, where a valve and fitting assembly allow the probe to be inserted into a pressurized, flowing pipe. This is one of its major advantages for retrofit applications in steam, gas, and water systems where shutdown is costly or not allowed.

What maintenance does a Verabar need?

Routine maintenance involves checking the impulse tubing for condensate (gas/steam service) or air (liquid service) and verifying the DP transmitter zero. In dirty service, periodic purging or rod-out of the sensing ports prevents buildup. The probe has no moving parts, so mechanical wear is not a factor. Typical inspection interval is 12–24 months depending on fluid cleanliness.

How does a Verabar compare to an orifice plate?

The Verabar causes 3–5% permanent pressure loss versus 40–70% for an orifice plate. It is cheaper and faster to install on large pipes (DN200+) because it does not require flanged pipe modification. However, the orifice plate has a longer track record in custody-transfer applications and is backed by more extensive standards (ISO 5167). For pipes below DN100, an orifice plate is often more practical and equally affordable.


Get a Verabar Flow Meter Quote

Sino-Inst supplies Verabar averaging pitot tube flow meters in insertion and flanged configurations, with optional integrated DP transmitters. We provide sizing calculations, material selection support, and hot-tap installation guidance for pipes up to DN6000. Tell us your pipe size, fluid, and operating conditions — we will send you a spec sheet and delivered price within 24 hours.

Request a Quote

Please enable JavaScript in your browser to submit the form

Verabar is a registered trademark of Yokogawa Electric Corporation. Annubar is a registered trademark of Emerson Electric Co. Product names are used for reference purposes only. Sino-Inst is an independent supplier and is not affiliated with Yokogawa or Emerson.

6 Types of Flow Elements Compared: Selection Guide

Updated Apr 17, 2026 — Differential pressure (DP) flow measurement relies on a flow element — a restriction in the pipe that creates a pressure drop proportional to flow rate. But not all flow elements perform equally. Each type trades off accuracy, pressure loss, and cost differently. This guide compares all six major types of flow elements with real specs and a decision framework so you can pick the right one for your application.

Contents

What Is a Flow Element?

A flow element is a restriction placed inside a pipe that creates a measurable pressure drop proportional to the flow rate. The DP transmitter reads that pressure difference, and the flow rate is calculated using Bernoulli’s equation: Q is proportional to the square root of the differential pressure.

All DP flow elements share this same operating principle. What separates them is the geometry of the restriction — and that geometry determines accuracy, permanent pressure loss, turndown ratio, and how they handle dirty or multiphase fluids. The discharge coefficient (Cd) captures these geometric differences in a single number.

What Are the 6 Main Types of Flow Elements?

The six main types of DP flow elements are: orifice plate, Venturi tube, flow nozzle, wedge meter, V-cone, and averaging pitot tube. Each uses a different restriction geometry to generate differential pressure.

Orifice Plate

The orifice plate is a thin plate with a concentric bore mounted between flanges. It is the most widely installed flow element globally, covering roughly 40% of all industrial flow measurements. Cd is approximately 0.6, accuracy is typically +/-0.5% to +/-2% of rate depending on installation, and turndown ratio is limited to about 3:1 due to the square-root relationship. Permanent pressure loss runs 40-80% of the generated DP.

Venturi Tube

A Venturi tube uses a converging inlet cone, a cylindrical throat, and a diverging recovery cone to gradually accelerate and decelerate flow. This smooth geometry recovers 80-90% of the generated pressure drop. Cd is around 0.98. Accuracy reaches +/-0.5% of rate. The Venturi handles dirty and slurry fluids well because there are no sharp edges to erode, but the unit cost is roughly 5-10x that of an orifice plate.

Flow Nozzle

The flow nozzle sits between an orifice plate and a Venturi in both cost and performance. It features a smooth elliptical inlet converging to a cylindrical throat, but lacks the Venturi’s recovery cone. Pressure recovery is about 40-60%. Cd is approximately 0.99. Flow nozzles are common in steam and high-velocity gas applications where erosion would damage a sharp-edged orifice plate.

Wedge Meter

The wedge meter uses a V-shaped restriction welded into the top of the pipe. It excels with slurries, viscous liquids, and dirty fluids because there are no cavities or stagnation points where solids can accumulate. Accuracy is typically +/-0.5% to +/-1.5%. Turndown reaches 5:1 to 8:1. The wedge geometry works reliably at low Reynolds numbers (below 10,000), where orifice plates become unreliable.

V-Cone

The V-cone positions a cone-shaped element in the center of the pipe, forcing flow to the annular space along the pipe wall. This design conditions the flow profile internally, reducing straight-run requirements to 0-3 diameters upstream. Accuracy is +/-0.5%, turndown reaches 10:1, and pressure recovery is 50-70%. The V-cone is a strong choice for tight installations where long straight runs are unavailable.

Averaging Pitot Tube

An averaging pitot tube (such as an Annubar) inserts a multi-port sensor across the pipe diameter, measuring both total and static pressure at multiple points across the flow profile. Permanent pressure loss is the lowest of any DP element — typically below 5% of the generated DP. Accuracy is +/-0.8% to +/-1.5%. Installation cost is low since the sensor can be hot-tapped into existing pipe without shutdown. Best suited for large pipes (DN200+) in HVAC, utility water, and stack gas.

How Do You Compare Flow Elements?

You compare flow elements across five performance dimensions: accuracy, permanent pressure loss, turndown ratio, relative cost, and application fit (see our companion guide on K-factor calibration). The table below puts all six elements side by side.

Flow ElementAccuracy (% of rate)Pressure Loss (% of DP)TurndownRelative CostBest Application
Orifice Plate+/-0.5 to +/-2.040-80%3:11x (baseline)Clean gas/liquid, budget projects
Venturi Tube+/-0.510-20%4:15-10xHigh-value fluids, slurries, large pipes
Flow Nozzle+/-0.5 to +/-1.040-60%4:12-4xHigh-velocity steam and gas
Wedge Meter+/-0.5 to +/-1.540-60%5:1 to 8:13-5xSlurries, viscous fluids, low Re
V-Cone+/-0.530-50%10:14-7xShort straight runs, wet gas
Averaging Pitot Tube+/-0.8 to +/-1.5<5%4:11-2xLarge pipes, HVAC, retrofit

The key takeaway: orifice plates dominate on cost, but they pay for that savings with the highest pressure loss. For high-value fluids — natural gas, refined chemicals, steam — the Venturi’s 85% pressure recovery translates directly into pumping or compression energy savings that often offset the higher purchase price within 1-3 years.

What Is the Difference Between an Orifice Plate and a Venturi Tube?

The core difference is pressure recovery. An orifice plate recovers only 15-20% of the generated DP, while a Venturi tube recovers 80-90%. This single difference cascades into cost, maintenance, and application decisions.

ParameterOrifice PlateVenturi Tube
Pressure Recovery15-20%80-90%
Cd~0.6~0.98
Purchase Cost (DN100)$200-$600$2,000-$6,000
MaintenancePlate replacement every 2-5 yrs (erosion)Minimal — no wearing edges
Straight Run Upstream15-40D5-10D
Dirty Fluid ToleranceLow (edge buildup)High (smooth bore)
Pipe SizesDN15 to DN1000+DN50 to DN3000+

Consider a 10-inch natural gas pipeline running at 500 SCFM. An orifice plate creates roughly 50 kPa of permanent loss, while a Venturi on the same line loses about 8 kPa. That 42 kPa difference, multiplied across 8,760 hours/year of compressor runtime, can cost thousands in electricity annually. For steam flow measurement, where every kPa of wasted pressure translates to lost thermal energy, the argument for a Venturi or flow nozzle strengthens further.

So when should you stick with an orifice plate? When the fluid is low-value (cooling water, ambient air), the line pressure is high enough that losses don’t matter, or the project budget is tight. Orifice plates are also easiest to re-range — just swap the plate for a different bore.

How Do You Select the Right Flow Element?

Follow a three-step decision process to narrow down six options to one or two candidates.

Step 1: Check Fluid Properties

Is the fluid clean, dirty, or a slurry? For clean gas or liquid, all six elements work. For dirty or viscous fluids, eliminate the orifice plate and averaging pitot tube — solids will foul the pressure taps or erode the sharp orifice edge. Wedge meters and Venturi tubes handle dirty service best.

Step 2: Check Your Pressure Budget

Can the process afford permanent pressure loss? If the system is gravity-fed or the pump is already near its limit, you need a low-loss element: Venturi tube or averaging pitot tube. If line pressure is 20 bar or higher and the loss is negligible relative to system pressure, an orifice plate is perfectly acceptable.

Step 3: Check Accuracy and Turndown Requirements

Do you need +/-0.5% accuracy with custody-transfer traceability? Venturi or V-cone. Is +/-2% enough for process monitoring? An orifice plate saves money. Need turndown beyond 4:1? The V-cone reaches 10:1. Understanding flow meter K-factor behavior across the range helps confirm whether your candidate element stays within spec at both low and high flows.

Frequently Asked Questions

What is the most common flow element?

The orifice plate. It accounts for approximately 40% of all industrial flow measurements worldwide, primarily because of its low cost, simplicity, and the extensive empirical data (ISO 5167) supporting its calibration.

Which flow element has the lowest pressure loss?

The averaging pitot tube produces the lowest permanent pressure loss — typically less than 5% of the generated DP. The Venturi tube comes second, recovering 80-90% of the DP through its diverging cone.

Can I use an orifice plate for steam?

Yes, but flow nozzles are preferred for high-velocity superheated steam. The sharp orifice edge erodes faster in wet or high-velocity steam. If budget requires an orifice plate, use stainless steel 316 or Monel and plan for more frequent inspections.

What turndown ratio can a DP flow element achieve?

Standard orifice plates and pitot tubes achieve 3:1 to 4:1 turndown. V-cone meters reach 10:1. Using stacked DP transmitters or multi-range transmitters can extend turndown to 8:1 or beyond for most element types.

Do flow elements need calibration?

Orifice plates, Venturi tubes, and flow nozzles manufactured to ISO 5167 can be installed without wet calibration — their Cd values are predicted from geometry and Reynolds number. V-cones, wedge meters, and pitot tubes typically require factory calibration against a reference standard.

Featured Flow Elements from Sino-Inst

Orifice Plate Flow Meter

SI-LG orifice plate flow meter — the standard DP primary element for steam, gas and clean liquids. Supports concentric, segmental and eccentric plates, pairs with any smart DP transmitter.

Venturi Tube

Classical venturi flow meter with low permanent pressure loss and high repeatability. Long service life on dirty liquids, gas and steam where orifice plates wear out fast.

V-Cone Flow Meter

V-cone flow meter (inner-cone / integrated cone type) for DP flow measurement in water, steam, natural gas and dirty process fluids. Rated to 450 °C and 40 MPa with high turndown and low pressure recovery.

n

Need help selecting a flow element for your application? Send us your pipe size, fluid type, operating pressure and temperature, and required accuracy. Our engineers will recommend the right element and provide a quotation — typically within 24 hours.

Request a Quote

Please enable JavaScript in your browser to submit the form

What Is a Metal Tube Flow Meter? Rotameter Specs & Selection Guide

Updated: April 15, 2026

A metal tube flow meter is a variable-area (VA) rotameter built with a stainless steel measuring tube instead of glass. A float inside the tube rises to a height proportional to the flow rate, and a magnetic coupling transfers that position to an external scale or a 4–20 mA transmitter. It’s the standard choice for high-pressure, high-temperature, or opaque fluids where a glass rotameter won’t survive.

This guide covers the working principle, when to pick metal tube over glass or digital flow meters, accuracy and pressure limits, and what to specify when ordering one. If you already know you need a rotameter and just want the specs, jump to the comparison table and product cards below.

Contents

What Is a Metal Tube Flow Meter?

A metal tube flow meter — also called a metal tube rotameter or LZ-series variable area flow meter — measures liquid or gas flow using a float suspended in a vertical metal tube. “Metal tube” distinguishes it from the glass-tube rotameters used for low-pressure water and air service.

Typical construction: 304 or 316L stainless tube, a stainless or Hastelloy float, and an external magnetic indicator with pointer or LCD display. Wetted parts can be PTFE-lined for acid and chlorine service. Connection is flanged or threaded, sizes DN15–DN200.

How Does a Metal Tube Rotameter Work?

Fluid enters the bottom, flows upward, and lifts a float until the upward drag force balances gravity. Higher flow pushes the float higher. A permanent magnet inside the float couples through the stainless wall to an external indicator or transmitter — no mechanical feedthrough, no seals to leak.

The governing equation is a balance between float weight and the dynamic pressure of flow through the annular gap:

Q = Cd × A × √(2 × g × Vf × (ρf − ρ) / (Af × ρ))

Where Q is volumetric flow, A is the annular flow area, Vf and Af are the float volume and cross-section, ρf and ρ are float and fluid density. What this tells you in practice: a float calibrated for water will read wrong on heavier oils or gases — always calibrate for the specific fluid.

For a deeper comparison of variable-area flow measurement vs other technologies, see our rotameter vs flow meter comparison.

Metal Tube vs Glass Tube vs Digital Rotameter

Metal tube is the right answer when pressure, temperature, or opacity rules out glass. Digital VA meters add outputs but cost more.

ParameterGlass TubeMetal TubeDigital VA
Max Pressure1 MPa (145 psi)25 MPa (3,600 psi)25 MPa
Max Temperature120 °C300 °C300 °C
Accuracy±2% – ±5% FS±1.5% – ±2.5% FS±1% FS
Turndown10:110:120:1
OutputVisual onlyVisual + 4–20 mA / HART / alarm4–20 mA / HART / Modbus
Opaque / colored fluidUnreadableOK (magnetic coupling)OK
Relative cost3–4×5–7×

Pick metal tube when you’re above 10 bar, above 120 °C, or measuring oil, slurry, or steam condensate. Stick with glass for clean low-pressure water and air. Pay for digital VA only if you need remote output on fluids where a magnetic flow meter or vortex flow meter won’t work.

What Pressure, Temperature and Accuracy Can It Handle?

Typical metal tube rotameter specs for standard LZ-series:

  • Size range: DN15 to DN200 (½” to 8″)
  • Flow range: 2.5 L/h to 100 m³/h for water; 0.1 to 1,000 Nm³/h for air
  • Pressure: PN16 to PN64 standard; PN250 on request
  • Temperature: −40 °C to +300 °C; higher with remote indicator
  • Accuracy: ±1.5% of full scale (±1% for calibrated premium units)
  • Repeatability: ±0.5%
  • Turndown ratio: 10:1
  • Outputs: local pointer, LCD, 4–20 mA, HART, alarm contact, pulse

Where Are Metal Tube Flow Meters Used?

Metal tube rotameters dominate three duty areas where digital flow meters either cost too much or can’t cope with the fluid.

  • Chemical injection and dosing. Low flow, aggressive fluids, and the need for a local visual indicator make rotameters the default on batch reactors and wastewater treatment skids.
  • Utility gas and steam condensate. Where upstream straight run is short and accuracy requirements are moderate, a metal tube VA is simpler than Coriolis or thermal mass.
  • Oil and lubricant supply lines. Dark fluids make glass rotameters unreadable. Magnetic coupling solves this without electronics.
  • High-pressure gas cylinders and analyzers. PN64+ rating handles industrial gas distribution without bulky electronics.

How to Specify a Metal Tube Flow Meter

Get these six items right on the RFQ and you’ll receive a workable quote without back-and-forth.

  1. Fluid. Name and density/viscosity. “Water” isn’t enough — brine, DI water, and boiler feed all calibrate differently.
  2. Flow range. Minimum and maximum normal flow. Size for the meter’s mid-range, not the max.
  3. Operating pressure and temperature. Nominal and maximum. Adds 20% margin as a default.
  4. Connection type. Flanged (ANSI B16.5 or EN 1092-1) vs threaded; pipe size and rating.
  5. Output and display. Local pointer only, LCD+4–20 mA, HART, alarm switches — each adds cost.
  6. Orientation and mounting. Vertical is standard. Horizontal or top-mount needs a specific float design — call it out.

Common mistake on RFQs: asking for a single meter to cover 0–100 m³/h on the same spec sheet. Turndown is 10:1, so that unit will not read below 10 m³/h reliably. Either split into two meters or switch to a vortex or electromagnetic meter with 100:1 turndown.

Featured Metal Tube Rotameters

LZ Metal Tube Rotameter

Variable-area metal-tube rotameter for liquid, gas and steam in low-flow lines. Local dial plus optional remote 4-20mA transmitter — built for small-flow chemical dosing and utility service.

High-Temp Metal Rotameter

Metal-tube rotameter rated to 25 MPa for high-pressure liquid and gas service. Local dial plus optional 4-20mA output — built for hydraulic, LNG and chemical-injection skids.

PTFE-Lined Metal Rotameter

Variable-area metal-tube rotameter for liquid, gas and steam in low-flow lines. Local dial plus optional remote 4-20mA transmitter — built for small-flow chemical dosing and utility service.

FAQ

What does LZ mean on a metal tube rotameter?

LZ is the Chinese industry naming code for metal tube variable-area flow meters. LZD is a version with damping, LZB has been superseded by LZ for glass-tube designs. Spec sheets from Chinese manufacturers will use LZ-, LZB-, LZD- prefixes interchangeably.

Does a metal tube rotameter need straight pipe upstream?

Yes — 5 pipe diameters upstream and 250 mm downstream is the standard recommendation. Turbulence pushes the float off centre and skews the reading. See the full flow meter straight length requirements.

Can a metal tube rotameter measure gas and liquid with the same unit?

No. The float is sized for the fluid’s density. A float calibrated for air won’t measure water correctly. Order separate units or ask for a dual-calibration chart if flow alternates between two known fluids.

How often does a metal tube rotameter need recalibration?

Every 2–3 years for process use. Check the float visually after any line flush — debris wedged in the annular gap causes readings to stick at specific values. Our flow meter calibration guide covers the full procedure.

What’s the minimum viscosity a metal tube rotameter can handle?

Viscosity immunity varies by float type. Standard ball floats work up to ~30 cP. For heavier lubricants and syrups, specify a viscosity-immune float (V-shape or dual-ring) which extends the range to ~300 cP.

Are metal tube rotameters ATEX certified?

Yes — most manufacturers offer ATEX Ex ia or Ex d versions for hazardous area installation. Specify the zone and gas group on the order. Standard mechanical pointer units without electronics are inherently suitable for most hazardous areas.

Ready to spec a metal tube rotameter? Send us fluid, flow range, pressure, temperature, and connection size. Our engineers reply within 24 hours with a sized unit and a price — no account needed.

Related: high-temperature steam condensate metering.

Request a Quote

Please enable JavaScript in your browser to submit the form

Float Switch for Water Tank: Wiring Diagrams + Troubleshooting

Updated: April 16, 2026 | By Sino-Inst Engineering Team

A float switch on a water tank is just a mechanical contact in your pump’s power loop. When the float rises, the contact opens (or closes); the pump stops (or starts). 90% of the calls we get about float switch failures are not failed switches at all — they are wiring mistakes, wrong terminal selection (NO vs NC), or pumps drawing more current than the switch’s contacts can handle. This page walks through the three wiring patterns that cover most water tank applications and a step-by-step fault-finding flow.

Contents

Quick wiring answer (read this first)

For an emptying tank (sump pump that runs when level rises): use the Normally Open (NO) contact. Float floats up → NO closes → pump runs.

For a filling tank (cistern pump that runs when level drops): use the Normally Closed (NC) contact. Float drops → NC stays closed → pump runs to refill.

If the float switch is rated for less amperage than your pump’s full-load current (FLA), wire it to a contactor or pump relay coil instead of directly to the motor. This is covered in Scenario C below.

How a float switch interrupts the pump circuit

A float switch is a single-pole device. Inside the float housing is either a mercury bulb (older designs), a steel ball that rolls into a microswitch (modern tilt-type), or a sealed reed switch on a stem with a magnet inside the float. All three behave the same way at the terminals: there is a common (C) wire and either a normally open (NO) or normally closed (NC) wire — sometimes both, in a single-pole double-throw (SPDT) switch.

The float switch is wired in series with one leg of the pump’s power supply. Power flows from the line, through the switch contact, through the pump motor, and back to neutral. Open the contact and the pump loses power. There is no logic, no controller, no signal — it is the same as a wall light switch with a heavier rating.

Cable-tilt floats use the cable itself as the pivot. The length of free cable below the cord grip sets the differential between pump-on and pump-off levels. For tank gauging applications that need continuous level (not just on/off), see our guide on tank level sensor types and selection.

NO or NC: choosing the right terminal for fill or empty

Read the application backwards. Decide first what state the pump must be in when the tank is full, then pick the contact that gives you that state.

ApplicationPump should run whenFloat position when runningUse terminal
Sump / sewage / lift pumpTank is filling up (empty it)Float UPNO (closes when float rises)
Cistern / make-up waterTank is draining (refill it)Float DOWNNC (closes when float drops)
High-level alarm onlyLevel is dangerously highFloat UPNO to alarm coil
Low-level dry-run cutoutLevel is too low (must STOP pump)Float UP (cuts off when float drops)NO to interlock chain

If your float switch only has two wires, the manufacturer has pre-wired it for one mode. Cable-tilt floats labeled “pump down” or “drain” are NO; floats labeled “pump up” or “fill” are NC. Checking with a multimeter on continuity is faster than reading the data sheet — flip the float by hand and watch the beep.

Scenario A: single float driving the pump directly

This is the simplest setup. Use it when the pump’s full-load amperage is below the float switch’s contact rating (typically 10A at 250VAC for a quality cable-tilt float, 5A for cheap reed-stem types).

  1. Cut the line (hot) wire of the pump cord, not the neutral. Cutting neutral leaves the pump energized when the float opens — a shock risk during service.
  2. Strip both ends of the cut and one lead of the float switch. Junction them in a watertight box outside the tank if possible.
  3. Connect line-in → float common; float NO (or NC, per the table above) → pump line-in.
  4. Cap or insulate the unused float lead (NC if you used NO, and vice versa). A floating bare conductor in a damp pump pit is the #1 reason these systems fail.
  5. Bond the pump’s green/ground wire all the way through to the supply ground. The float switch never interrupts ground.

Cable-tilt models (the egg-shaped floats on a cord) self-set their pump-on / pump-off differential by the length of cord below the cable clamp. A short tether (4–6 inches) gives a tight ±3 inch level band; a long tether (12–18 inches) gives a 12+ inch band. Long tethers reduce pump cycling, which is what kills small submersibles.

Scenario B: dual float for fill and high-level cutoff

Use two floats when one float can’t safely handle both the start command and a backup safety cutoff. Common cases: cisterns where overflow would damage the building, sewage tanks where a stuck float means flooding, fuel transfer systems.

  • Lower float (working float): wired to start/stop the pump on its normal differential band.
  • Upper float (high-level cutoff): wired in series with the working float on a fill system, OR to an alarm/shutdown circuit on a drain system. If the working float jams, the upper float overrides.

For a fill cistern: line → upper-float NC → lower-float NC → pump line-in. Both floats must be DOWN (NC closed) for the pump to run. The pump stops as soon as either float rises. The upper float should be set 4–6 inches below the overflow line so it has time to act before water spills.

For a sump pump: lower float NO drives the pump; upper float NO drives a 12V alarm or an internet-connected sensor. The upper float never touches the pump circuit — its only job is to tell you the working float failed.

Scenario C: float through a contactor for large pumps

If your pump’s nameplate shows more than 8–10 amps, do not run pump current through the float switch contacts. Contact welding is what kills float switches in heavy applications: every start arc burns a little metal, and after a few hundred cycles the contacts fuse closed and the pump runs forever.

The fix is a contactor (motor starter relay) sized to the pump. The float switch only carries the contactor coil current — typically 100–300 mA at 24V or 120V — which is well within any float switch’s rating. The contactor’s heavy contacts handle the pump load and can be replaced as a wear part.

  1. Wire the float switch to the contactor coil terminals (A1, A2). Float NO in series with the coil hot leg.
  2. Wire the pump motor leads to the contactor’s load contacts (T1, T2, T3 for 3-phase).
  3. Add a thermal overload block downstream of the contactor sized to the pump’s FLA × 1.15.
  4. If you need remote start/stop, wire a HAND-OFF-AUTO selector switch in parallel with the float across the coil.

This is also the right approach for explosion-proof installations. The float can be intrinsically safe (low energy, in the hazardous area), the contactor sits in a non-hazardous panel. For a deeper look at high-current and DP-style installation rules, see our DP transmitter installation guide.

Five wiring mistakes that burn out pumps and switches

  • Switching the neutral, not the line. Pump stays energized when float opens; the casing can become live if internal insulation fails.
  • Picking the wrong NO/NC terminal. Pump runs continuously or never starts. Test with a multimeter before powering up.
  • Tether too short on a cable float. Pump cycles every 30 seconds, motor windings overheat in days.
  • Float allowed to rest against the tank wall. Float wedges, never tilts. Always install with at least 6 inches of free swing.
  • Running 15A pump current through a 10A float contact. Contacts weld closed; pump runs the well dry. Add a contactor (Scenario C).

Troubleshooting flow when the pump won’t stop or won’t start

Run this in order. The first three steps catch about 80% of float switch problems without removing the switch from the tank.

  1. Check power at the pump. Disconnect the float from the circuit (jumper across float wires) and try the pump. If the pump still won’t run, the problem is upstream of the switch — breaker, cord, motor.
  2. Manually flip the float. With the system de-energized, lift the float through its full travel. You should hear a faint click (microswitch) or feel a snap (mercury). No sound = stuck switch, replace.
  3. Continuity test at the float wires. Disconnect both float leads. Touch a multimeter on continuity to the two leads. Tilt the float — beep should go on/off cleanly. Intermittent or no change = internal switch failure.
  4. Inspect the cord grip and tether. Cable that has slipped 1–2 inches will shift the trigger level enough to either short-cycle or never trigger. Re-clamp with the original tether length.
  5. Look for grease or scale on the float body. A float coated in pump grease becomes neutrally buoyant and stops tilting. Wipe clean with mineral spirits.
  6. Measure inrush current at the contacts. If you’ve replaced two switches in six months, the pump is over-amping the contacts. Move to Scenario C wiring with a contactor.

When to replace the switch (and when not to)

Replace if: the float body is cracked, the cord insulation is damaged, the continuity test in step 3 is intermittent, or the contacts show black welding marks when opened. Float switches are not user-serviceable — there are no contacts you can clean inside a sealed cable-tilt body.

Don’t replace if: the issue is grease/scale on the float (clean it), the tether has slipped (re-clamp), or the wiring is plain wrong (rewire per the table above). A new switch in the same wrong configuration fails just as fast as the old one.

For continuous water tank monitoring (level reading, not just switching), a 4-20 mA hydrostatic submersible or ultrasonic gauge is a better tool. See our water tank level sensors guide for the trade-offs.

FAQ

Why does my float switch click but the pump doesn’t run?

The switch is doing its job — the pump circuit is broken somewhere else. Test continuity through the float leads while you tilt it, then check the pump’s own cord and breaker. A clicking switch with no pump action is almost never a failed float.

Can I use the same float switch for hot water (over 60°C / 140°F)?

Standard polypropylene cable-tilt floats are rated to about 50°C continuous. For hotter water (boiler feed, condensate tanks), pick a stainless-steel stem float with a Buna-N or Viton seal rated to 120°C. The cheap pool-pump style will deform and sink within weeks at boiler temperatures.

Do I need a relay if my pump is only 1/3 HP?

Probably not. A 1/3 HP submersible pump draws roughly 6–8 amps running and 15–25 amps inrush at start. Most quality cable-tilt floats are rated 13A inductive at 120V, which covers it. If you’re cycling more than 4 times per hour or using a no-name float, add a contactor anyway — it costs less than a replacement switch.

How long should a float switch last?

In clean water with proper sizing, 100,000+ cycles or roughly 5–7 years. In sewage with grease and stringy debris, expect 1–2 years and inspect quarterly. Switches in chemical service rarely make it past 6 months without seal degradation; use a non-contact alternative there.

Can I wire two pumps off one float switch?

Not directly. Wire each pump’s contactor coil in parallel off the same float NO contact, and stagger the contactor pull-in voltages so they don’t both start simultaneously and trip the breaker. For lead/lag duplex pumping, use a duplex pump controller with an alternator relay — the float is just one input.

Need help sizing or troubleshooting?

Send your pump nameplate, tank dimensions, and a photo of the existing wiring to our engineers. We’ll specify the right float series and wiring scheme — and we’ll tell you straight if a continuous-level sensor would be the better tool. Use the form below or contact us via the contact page.

Request a Quote

Please enable JavaScript in your browser to submit the form

How Does a Capacitive Liquid Level Sensor Work? (Engineer’s Guide 2026)

Updated: April 15, 2026

A capacitive liquid level sensor detects level by measuring the capacitance change between a probe and the tank wall (or a second probe) as the liquid rises or falls. The liquid acts as the dielectric — its dielectric constant determines how much capacitance changes per centimeter of level. That’s the whole working principle in one sentence.

What matters in the field is knowing when this technology works well (oils, water, most chemicals, slurries) and when it doesn’t (varying dielectric, heavy coating, high-purity water). This guide walks through the physics, sensor types, calibration, and the dielectric-constant numbers you actually need to size a probe.

Contents

How Does a Capacitive Liquid Level Sensor Work?

The sensor acts as one plate of a capacitor; the tank wall or a second rod acts as the other plate. Liquid between them is the dielectric material. When level rises, more of the probe is submerged, dielectric material replaces air (εr of water is 80 vs air’s 1), and capacitance jumps.

The transmitter converts that capacitance change into a 4–20 mA or digital signal proportional to level. The equation:

C = (ε0 × εr × A) / d

Where ε0 is the vacuum permittivity, εr is the relative dielectric constant of the liquid, A is the submerged electrode area, and d is the gap. Because εr is the only variable that depends on the medium, the sensor must be calibrated to the specific liquid.

What Are the Main Types of Capacitive Level Sensors?

Four probe configurations cover almost every tank scenario.

  • Bare rod (single probe, metal tank). The rod and the conductive tank form the capacitor. Simplest and cheapest. For conductive liquids like water, the rod must be insulated.
  • Insulated rod. PTFE or PFA jacket prevents shorting in conductive media. Standard for water, acids, and alkalis.
  • Dual-rod (coaxial). A second rod replaces the tank wall — used in plastic or fiberglass tanks where there’s no grounded reference.
  • RF admittance. Adds a driven guard to cancel out coating effects on the probe. Used on sticky liquids like slurries, glue, and chocolate. See our RF admittance level sensor guide.

What Dielectric Constants Work with Capacitive Sensing?

Capacitive sensors work reliably when the liquid’s dielectric constant is ≥1.8 and stable. Below that, capacitance change per cm is too small to measure reliably. If εr varies with temperature or composition, calibration drifts.

Liquidεr (approx.)Capacitive sensing
Air / vapor1.0Reference
Gasoline, kerosene2.0Marginal — needs sensitive electronics
Diesel, fuel oil2.1–2.3Good
Lubricating oil2.2–2.8Good
Vegetable oil3.0Good
Alcohols (ethanol)24Excellent
Water (tap)80Excellent — requires insulated probe
Aqueous acids/bases40–80Excellent — requires insulated probe

Do not use capacitive sensing on liquids with unpredictable εr — examples include variable oil–water emulsions and slurries of changing solids content. Use guided wave radar or float-based measurement instead.

What Are the Advantages and Disadvantages?

Short answer: capacitive is a low-cost, rugged workhorse, but it’s sensitive to medium properties and probe coating.

AdvantagesDisadvantages
No moving parts — long service lifeNeeds stable dielectric constant
Works in pressurized and high-temp tanks (to 200 °C, 40 bar)Coating on probe shifts calibration
Compact — fits small tanks where radar doesn’tMetal tank required for single-rod types
Low cost: $150–$600 per sensorMust be recalibrated if liquid changes
Accuracy ±1% of full scaleFoam and vapor can affect top of range

How Do You Calibrate a Capacitive Liquid Level Sensor?

Two-point calibration handles most capacitive sensors. Do it with the actual process liquid, not water. For general calibration procedures across flow and level instruments, see our calibration procedures guide.

  1. Empty the tank. Set the low (4 mA / 0%) point. This captures probe-to-tank baseline capacitance.
  2. Fill to 100% of measuring range. Set the high (20 mA / 100%) point.
  3. Verify at midpoint. Fill to 50% and check reading is 12 mA ±1%. If off, check for probe coating or partial air gap.
  4. Log ambient temperature. εr of many oils changes 0.1% per °C. For wide temperature swings, use a transmitter with temperature compensation.

A common field mistake is to calibrate with water when the tank will hold oil. The dielectric constants differ by a factor of 30, and the sensor reads nonsense until you recalibrate.

Capacitive vs Float vs Ultrasonic: Which to Pick?

Capacitive wins on cost and durability in small-to-medium tanks with stable liquids. Float meters win where power or electronics aren’t available. Ultrasonic wins on non-contact measurement in open tanks.

CriterionCapacitiveFloatUltrasonic
Contact with liquidYesYesNo
Moving partsNoYesNo
Handles foam / vaporFairFairPoor
Handles sticky / coating liquidsPoor (RF admittance: Good)PoorGood
Accuracy±1% FS±3–5% FS±0.5% FS
Typical cost (1 m range)$150–$600$50–$300$300–$800

Featured Capacitive Level Sensors

Capacitance Level Transmitter

SI700 RF capacitance level transmitter for continuous and point level detection in liquids and solids. Resists coating, condensation and vapour layers — reliable where radar struggles.

Capacitive Water Level Sensor

Contact and non-contact capacitive water level sensor for storage tanks, wells and corrosive liquids. Resists temperature, humidity and conductivity drift for reliable readings where floats fail.

Capacitive Level Switch

Capacitive (RF) level sensor for liquid, solid and interface measurement. Handles high-temp, corrosive and easy-to-crystallise media with anti-clogging probes and 4-20mA output.

FAQ

Can a capacitive level sensor measure both liquids and solids?

Yes, for solids with dielectric constant ≥1.8 — grain, plastic pellets, cement powder all work. The accuracy is lower (±3%) because dielectric varies with bulk density.

Does probe length affect accuracy?

Longer probes give higher capacitance change per unit level, which improves resolution. Up to a point — probes over 4 m may need a high-sensitivity transmitter. Never cut a factory probe in the field; it changes the calibration curve.

What makes RF admittance different from standard capacitive?

RF admittance uses a driven guard electrode that cancels out capacitance caused by coating on the probe. Standard capacitive sensors drift when a residue builds up; RF admittance ignores it. Use RF admittance on sticky liquids and heated oils.

Does a capacitive sensor work with pure deionized water?

Yes, but with reduced accuracy. DI water’s dielectric constant is the same (80), but its low conductivity causes response instability. For ultra-pure water service, conductivity-based or ultrasonic water level sensors are more reliable.

Is capacitive level sensing safe for hazardous areas?

Yes. Intrinsically safe and explosion-proof versions are available with ATEX and IECEx certifications. Specify Ex ia for flammable liquid tanks and Ex d for vapor spaces.

How long does a capacitive level sensor last?

With no moving parts, expected life is 10–15 years in normal service. PTFE-jacketed probes in aggressive chemicals last 5–10 years before coating degradation forces replacement.

Need to confirm whether capacitive is the right fit for your tank? Send us the liquid, probe length, and tank material. Our engineers will recommend the right probe type and output, plus a quote — usually within 24 hours.

Request a Quote

Please enable JavaScript in your browser to submit the form